This recipes amount is perfect for a deep round 15cm tin or a shallow round 20cm tin. I prefer to use a deep tin as the deeper the tin the more layers you can have.
Enjoy…
What you need… CAKE
- 90 grams good quality cooking chocolate, I used a milk chocolate, but dark would give you a richer result.
- 2 teaspoons Cocoa powder
- 3/4 cup Water
- 125 grams butter
- 1 cup brown sugar
- 1 teaspoon vanilla
- 2 Eggs
- 1/3 cup coconut cream
- 1/2 cup plain flour
- 1/2 cup self raising flour
- 1/2 teaspoon bi-carb soda
How you do it… CAKE
- Pre heat your over to 160° C
- Grease and line your tin with baking paper. With big cakes like this I like to have the baking paper at least 4 cm higher than tins lip around the side.
- On the stove over a low heat mix the chocolate, cocoa and water together until all melted, set aside to cool for at least 15 minutes.
- Using an electric mixer, mix together the butter, sugar and vanilla.
- Add in both flours and bi-carb, as well as the eggs and coconut cream
- Once all combined turn the speed up and beat for up to 4 mins.
- Use a spatula to fold in the cooled chocolate mixture.
- Bake for around 1 hour and 15 mins, keeping an eye on it towards the end and covering with tin foil if it starts to brown too much.
- Like all cakes tests with a skewer or butter knife to check it is cooked through before taking it out to cool. If the cake isn't ready I like to check again at 7 minutes intervals.
- Being a lighter cake let it cool fully in the tin before moving to a wire rack, this will help prevent it from collapsing.
- Once completely cool, very carefully slice the cake horizontally into to thirds.
What you need…
- 100 grams butter
- 200 grams icing sugar
- 70 grams milk chocolate, once again you can use dark chocolate for richer flavour
- splash of milk
How you do it…
- In a Mixer beat the slightly soften butter for 5 mins so it lightens in colour and texture.
- Add in the icing sugar 50 grams at a time, beat for another 5 mins.
- While the buttercream is beating, melt the dark chocolate in a heatproof bowl over a simmering saucepan. Let cool slightly (not hot to touch)
- Turn your mixer off and using a spatula fold in the melted chocolate.
- Mix in a splash of milk if the butter cream is too thick.
Putting it together/ Caramel Sauce
- smooth a thin layer of the buttercream over the top of all three slices of the cake, creating a crumb coating.
- After the crumb coat has set, this takes about an hour, divide the buttercream into thirds and lather it onto each piece of cake.
- Carefully re-assemble the cake
- Decorate with some chocolate swirls. To make the swirls, melt some chocolate in a heat proof bowl over simmering water, once melted smear some onto a clean cool bench or the back of a tin, let it cool enough to start setting, use a metal spatula or butter knife to scrape the chocolate and make it swirl. I found the easiest way to do so was to push the knife away for me.
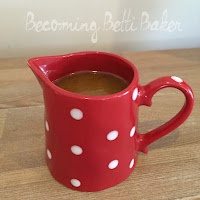
- Serve with a simple caramel sauce, I wasn't planning too, but my 4 year old looked at oddly when she asked if it had caramel in the cake and I said no. So I basically caved to peer pressure from my pre schooler.
- I whipped one up with 1 cup of brown sugar, 4 tablespoons of butter and 1/2 a cup of milk (I didn't have any cream)
- In a saucepan over medium heat whisk all the ingredients together for 5 minutes.
- you can serve it hot, warm or cold!

*** If you want to have a thicker layer of butter cream, simply double the amount, the process is exactly the same.
Fun fact, your cake will take much longer to cook if your 2 year old enters the kitchen and turns the oven down to 90 degrees without your knowledge!
Happy Baking


No comments :
Post a Comment